homemade stick tree }{ foraged decor
Remember the tall branch tucked in the corner at the end of this post? Well, I promised I'd be back to share what I had in store for the beauty!
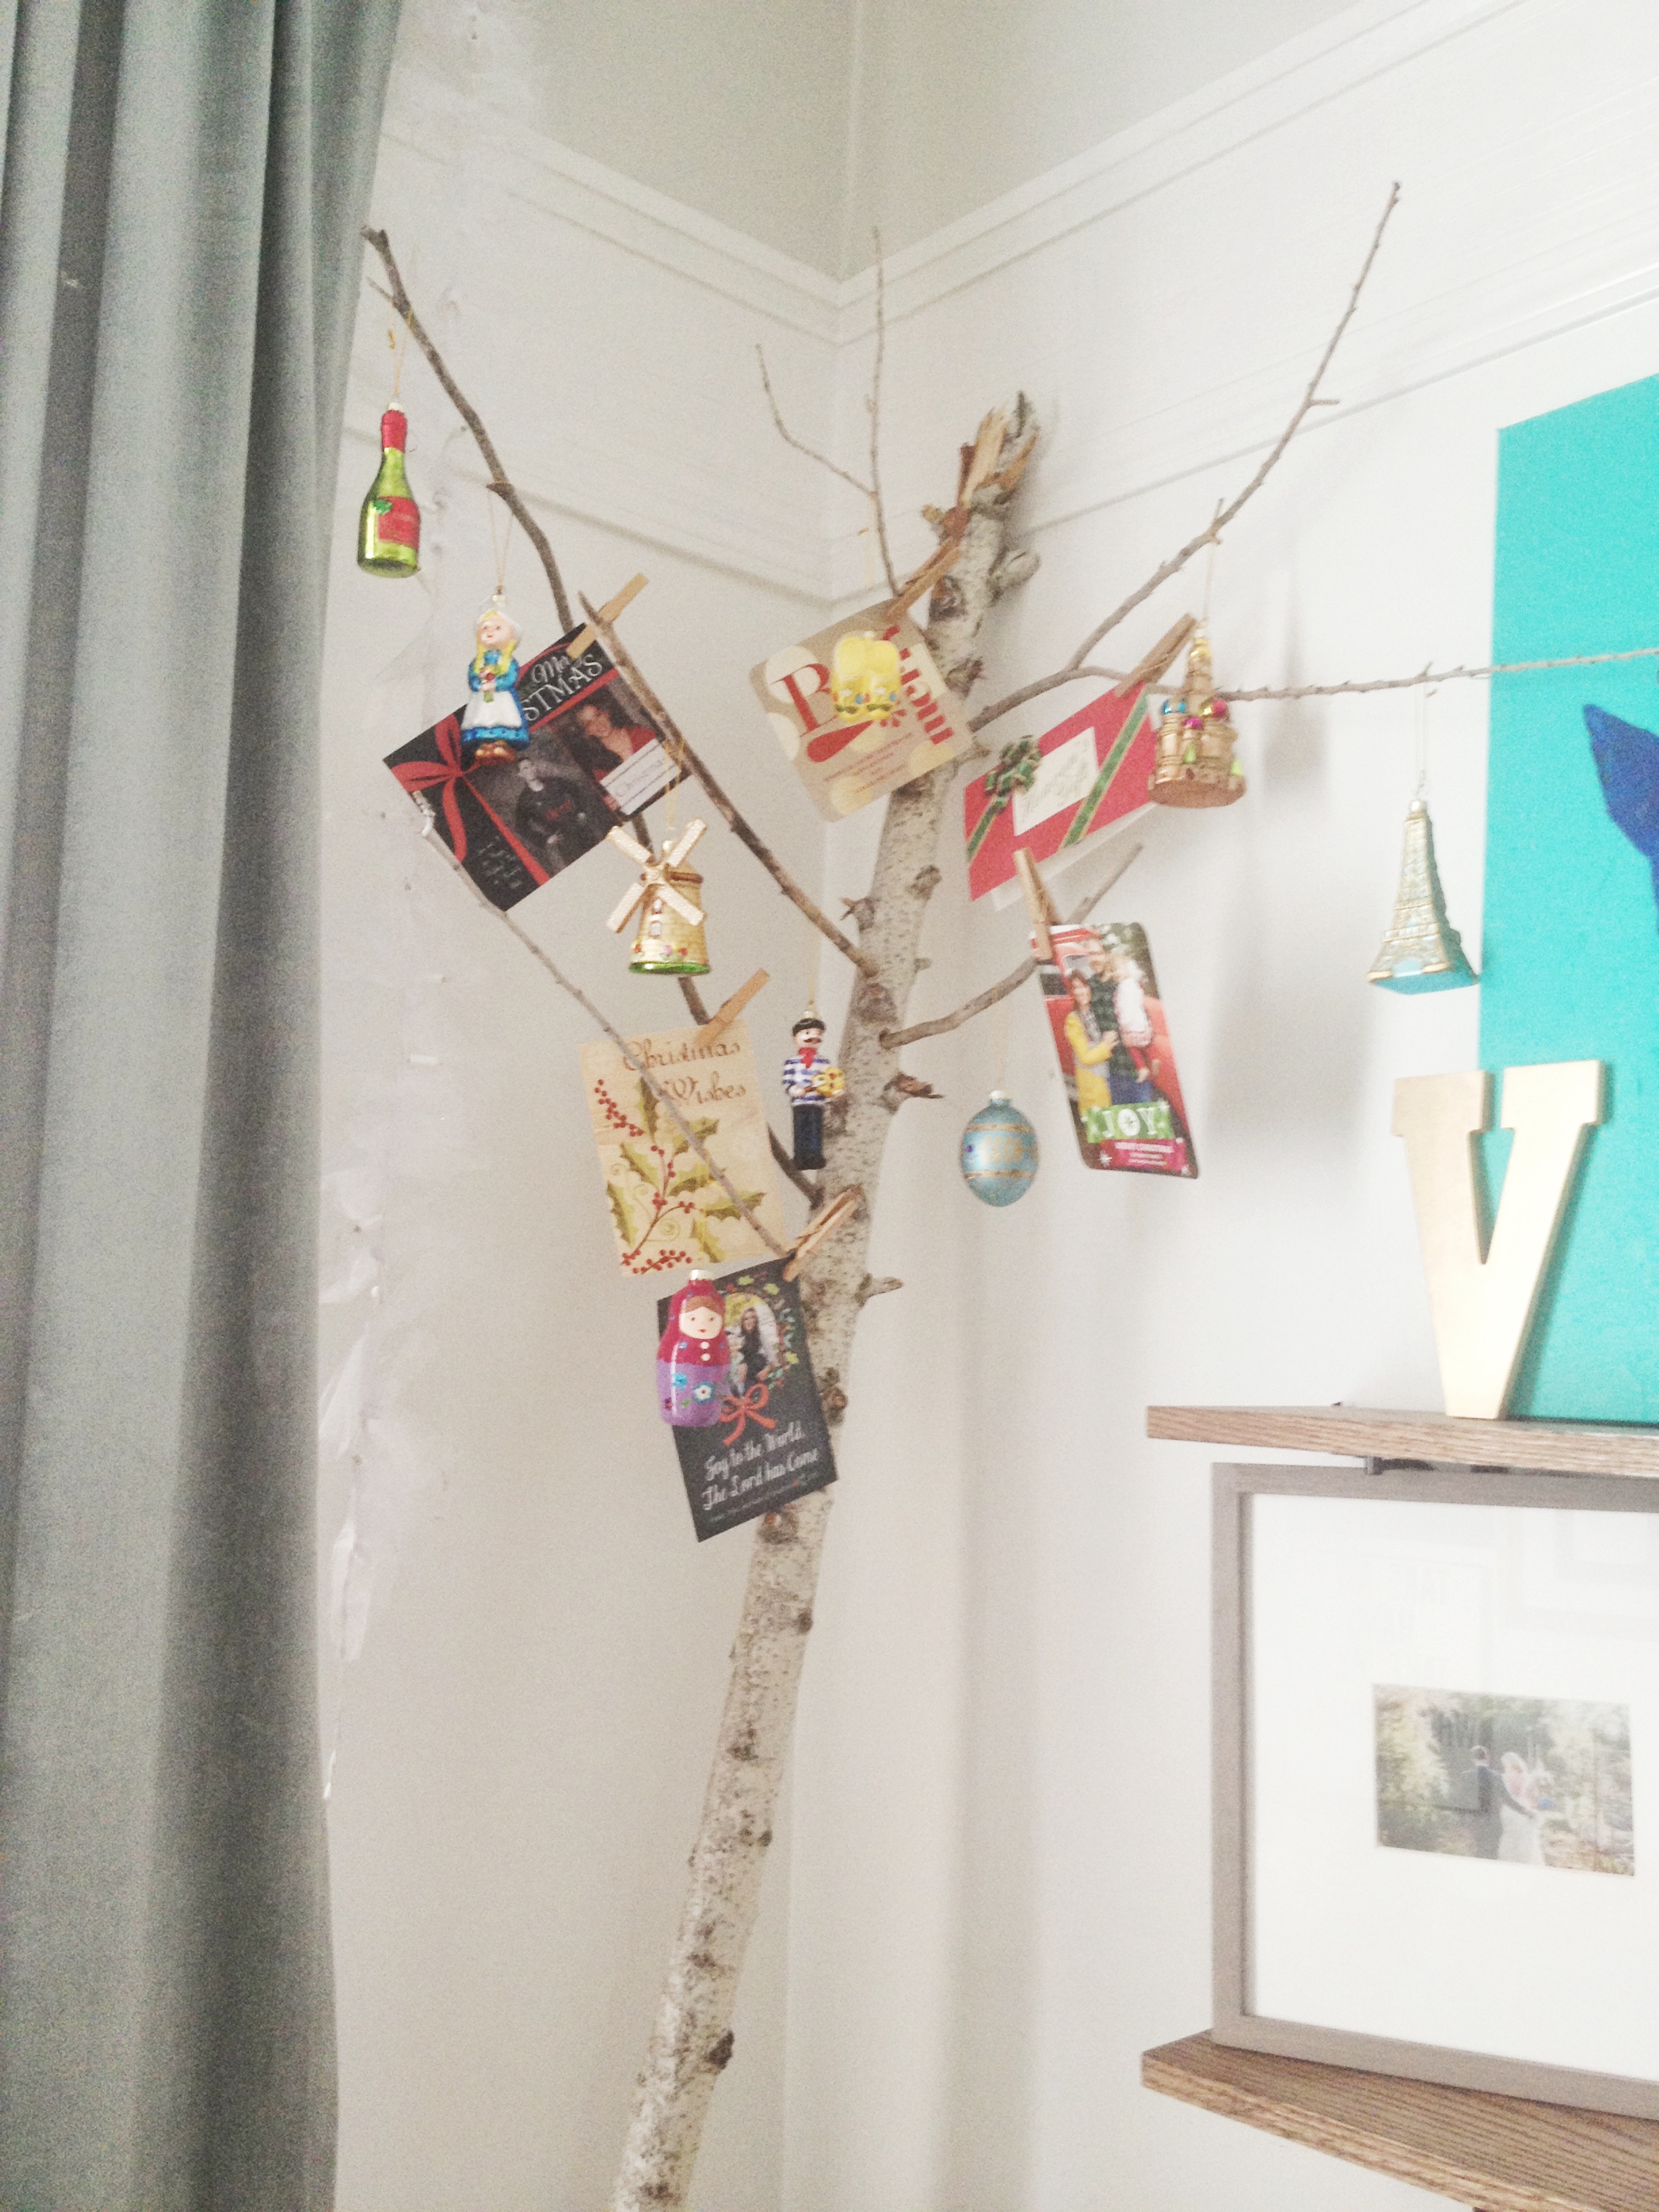
I wanted a special place to display our travel themed ornaments that I've collected over the past couple of years from Cost Plus World Market. They're adorable glass ornaments and come in sets of 3 in fun country themes. They're colorful and quaint and don't really go with our neutral Christmas tree. So I decided to make a tree just for them.
We started with a branch that we found on a walk near the riverbed. Its 10 foot length was a little much so we used a chainsaw to take off about 2 feet. We went on another walk to find sticks to be the tree's branches. Daniel had the great idea to take our largest drill bit with us to ensure that we didn't get any sticks that were too large.
With "branches" in hand, we came back to drill the holes. Keep in mind that angle is important so try to drill at an angle that will allow your branches to point upward. We used several different drill bit sizes depending on the width of the sticks.


After Daniel drilled the holes, I placed the branches and decorated the new tree. Not only is it the perfect place for our international ornaments, but it's a great spot to display our Christmas cards from friends and family! It doesn't get any cheaper, easier, or more festive!